In today’s fast-paced world, automation is key to efficiency. Whether it’s managing a large network of computers or performing repetitive administrative tasks, automation can save time and reduce errors. One powerful tool that has emerged as a favorite among system administrators is PowerShell, a task automation and configuration management framework from Microsoft.
PowerShell’s capabilities can be further extended with Power Automate using the ITautomate connector. This combination allows users to create workflows that can execute individual PowerShell commands or complete PowerShell scripts on remote devices or on cloud processing agents. In this blog post, we’ll walk you through the steps to use PowerShell Script Actions in Power Automate with the ITautomate connector.
Step 1: Create a New Workflow
First, you’ll need to create a new workflow in Power Automate. This is where you’ll define the trigger that will initiate the workflow. The trigger could be anything from a scheduled time to an email arrival or a file modification.
- Log in to Power Automate.
- Click on “Create” and select the type of workflow you want to create.
- Choose the trigger that will initiate the workflow.
- Name your workflow and click “Create.”
Step 2: Add the ITautomate PowerShell Action
Next, you’ll add the ITautomate PowerShell action to the workflow.
- Click on “New Step” in the workflow editor.
- Search for the ITautomate “Issue PowerShell Command” action in the ITautomate connector.
- Select the action and add it to the workflow.

Step 3: Enter the PowerShell Script or Saved PowerShell Command
Now, you’ll enter the PowerShell script or saved PowerShell Command that will be executed within the workflow.
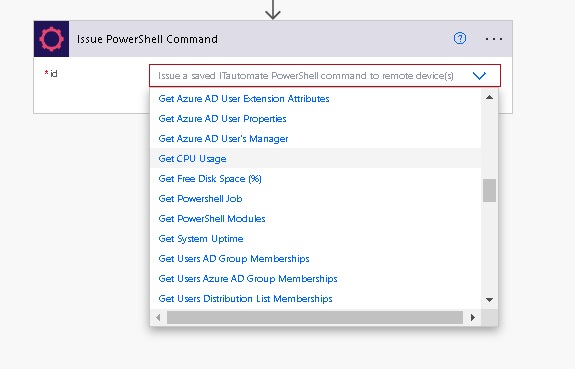
- Enter the script text directly into the action by selecting the “*Issue custom PowerShell script” command, or select one of our ready made actions .
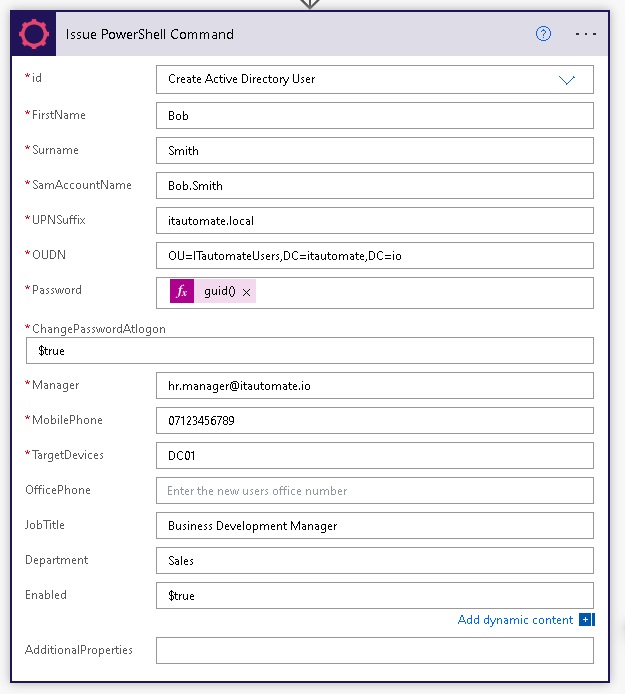
- The connector interface will update with the required fields for that action. Enter the required information or select any dynamic content required in this step.
- Enter the target device you would like to execute the script on. For Active Directory commands, the logon account will need the required Active Directory permissions to process the command successfully.

Conclusion
With the ITautomate connector, using PowerShell Script Actions in Power Automate becomes a powerful tool in your automation arsenal. By leveraging the capabilities of PowerShell and the ITautomate connector, you can automate complex tasks and perform advanced system administration tasks within Power Automate.
Whether you’re looking to automate repetitive tasks, streamline processes, or perform advanced system administration tasks, PowerShell Script Actions with the ITautomate connector are worth exploring. They offer a flexible and robust solution that can adapt to various scenarios and needs.
 Portal
